updated: 09 September 2013
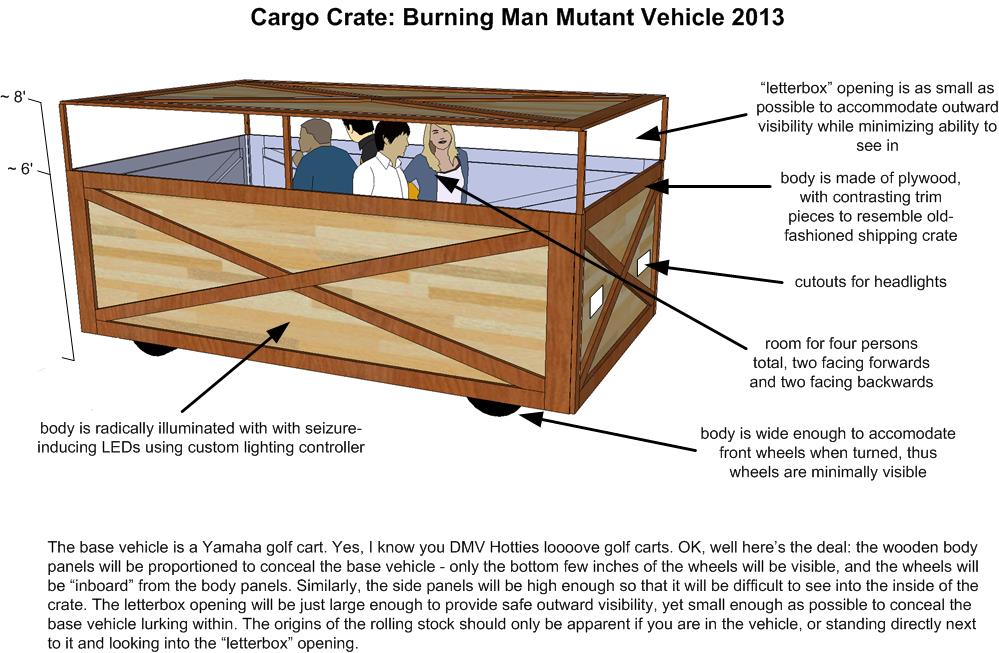
Cargo Crate Mutant Vehicle
Here's the original proposal as submitted to the Burning Man Department of Mutant Vehicles (DMV):
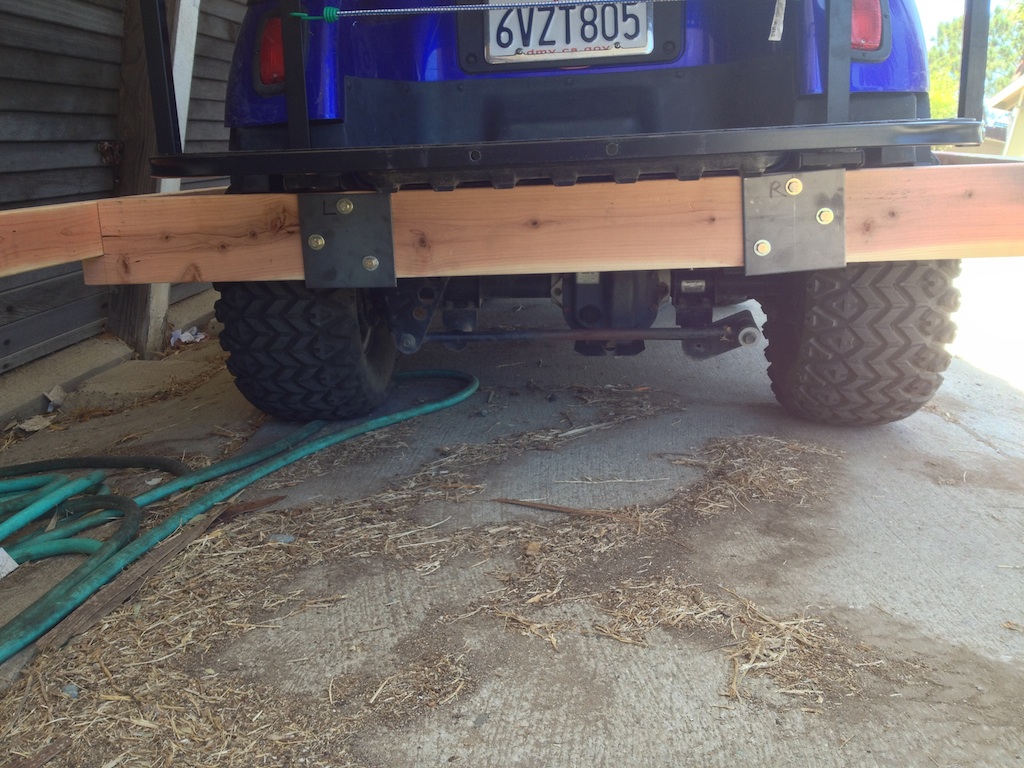
Wooden Subframe - June 11, 2013
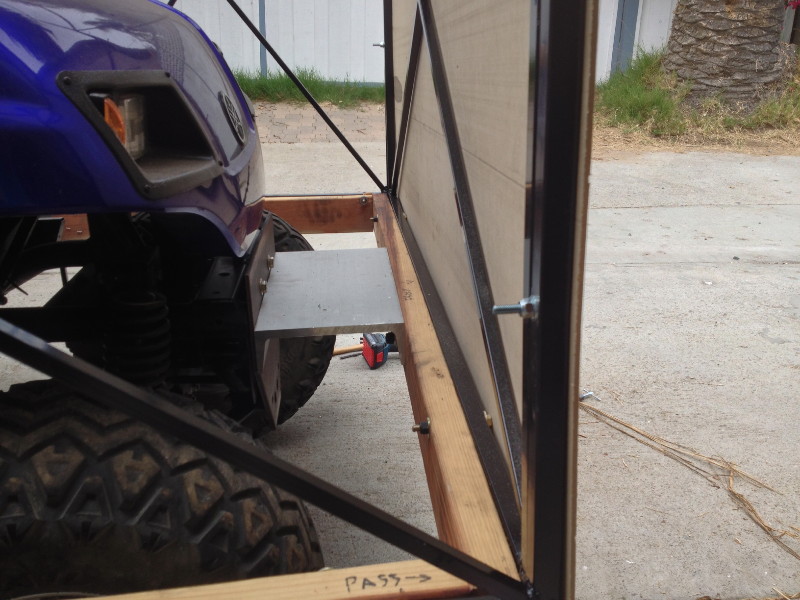
The first thing that needed to be done was to build a subframe which would support everything else. The subframe needed to extend several inches to the sides and front to allow clearance for the wheels during turns. Industrial Metal Supply had some awesome aluminum channel which was perfect for the task. In the course of doing all this I discovered the golf cart frame is not rectangular - it's slightly V-shaped. So as a result the mutant vehicle will be about 8 inches wider at the rear than at the front. It's not at all apparent to the naked eye, but it sure is apparent when you're cutting material!
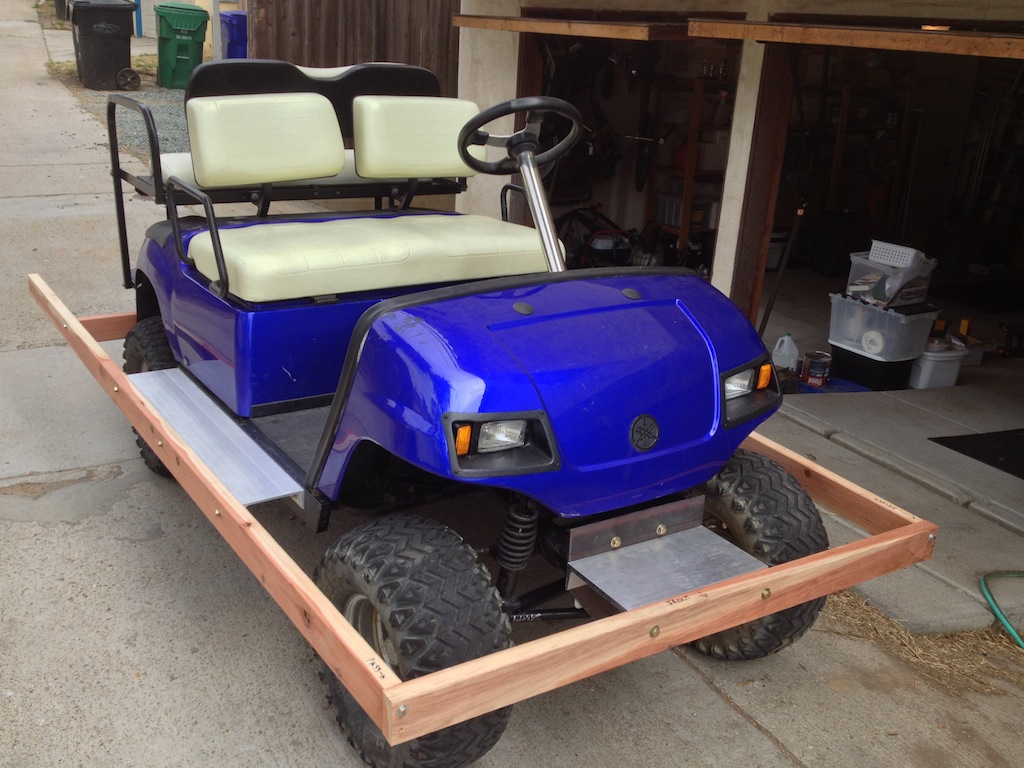
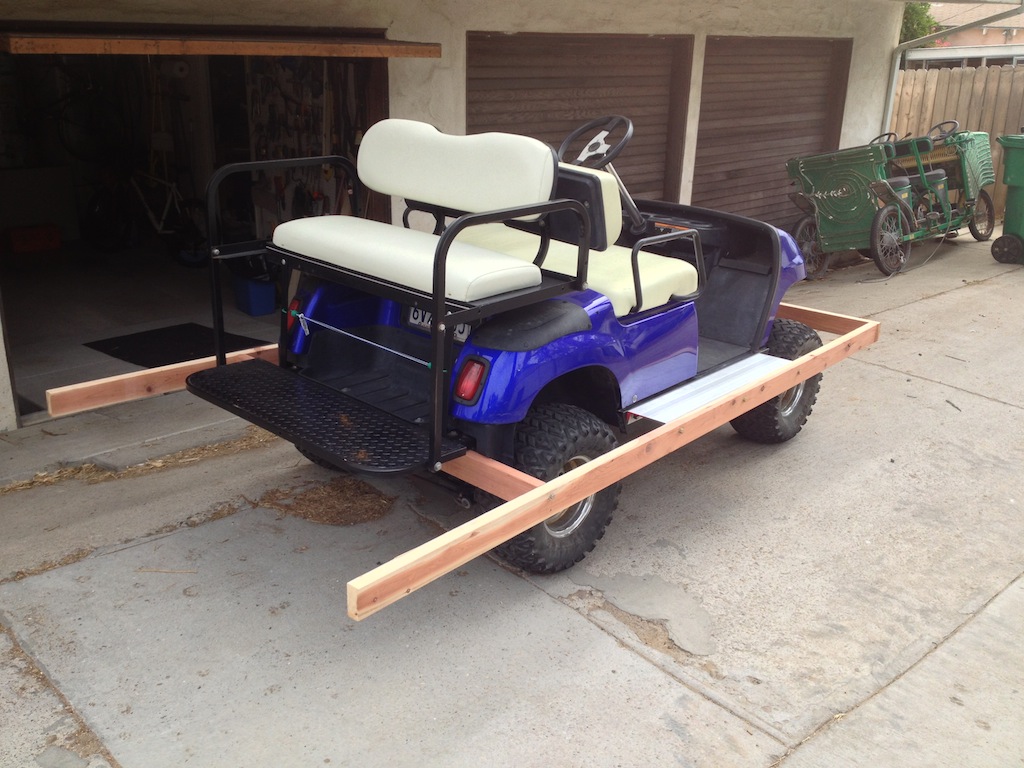
Originally the subframe was going to attach to the rear seat footrest, but I discovered that the footrest flexes a lot when you step on it. So instead of supporting the frame it would end up stressing it. So instead I bolted the rear beam to the back of the golf cart frame and cantilevered rearward from there. I was concerned about how much weight this cantilever might end up supporting, so I decided to go with a super-beefy 2x6 rear beam.
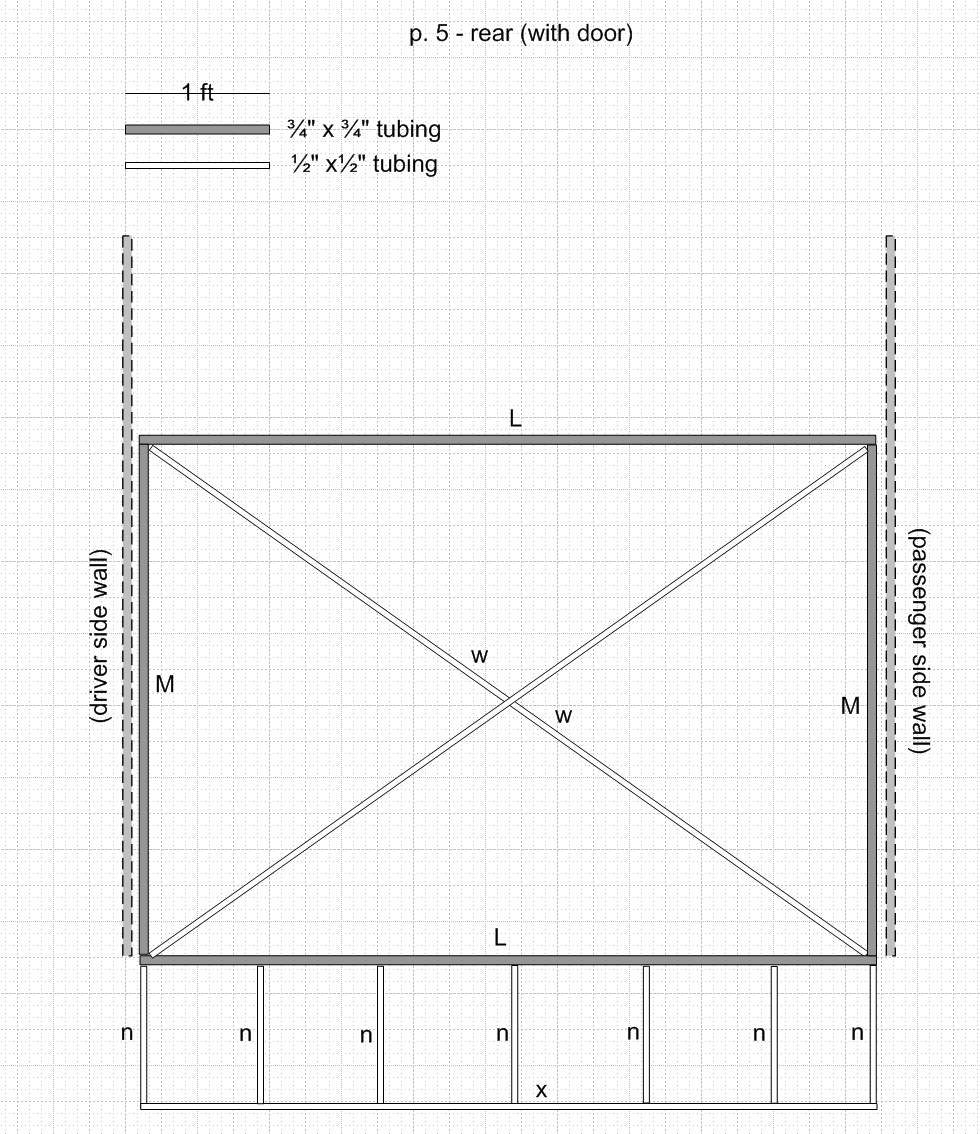
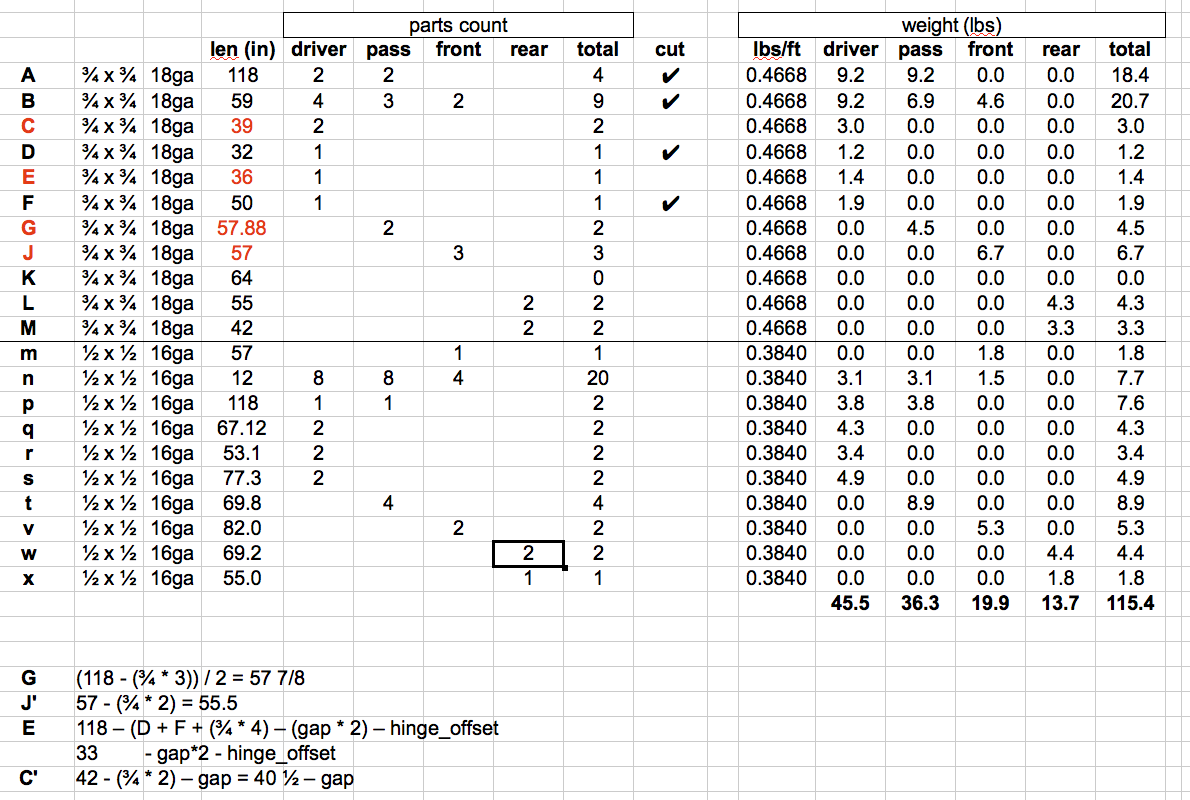
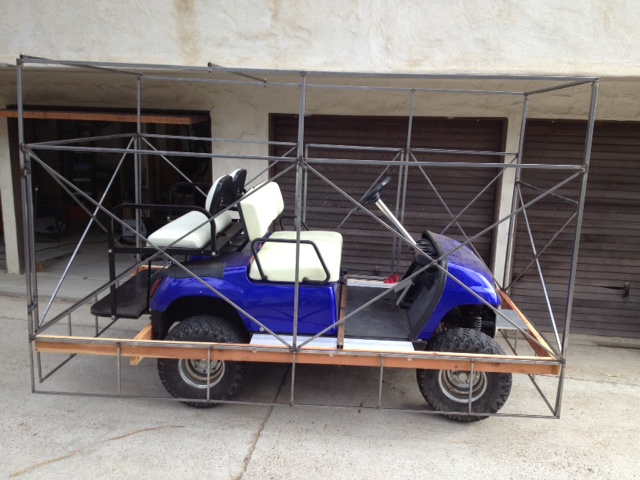
Metal Frame Plans - June 20 - July 7, 2013
Next comes the frame that would support the bodywork. Originally this was going to be wooden, but my brother Rich talked me into going with tubular steel instead, and offered to come down and weld it up (and show me how to weld in the process). Here's the metal budget for the frame. This went through many revisions.
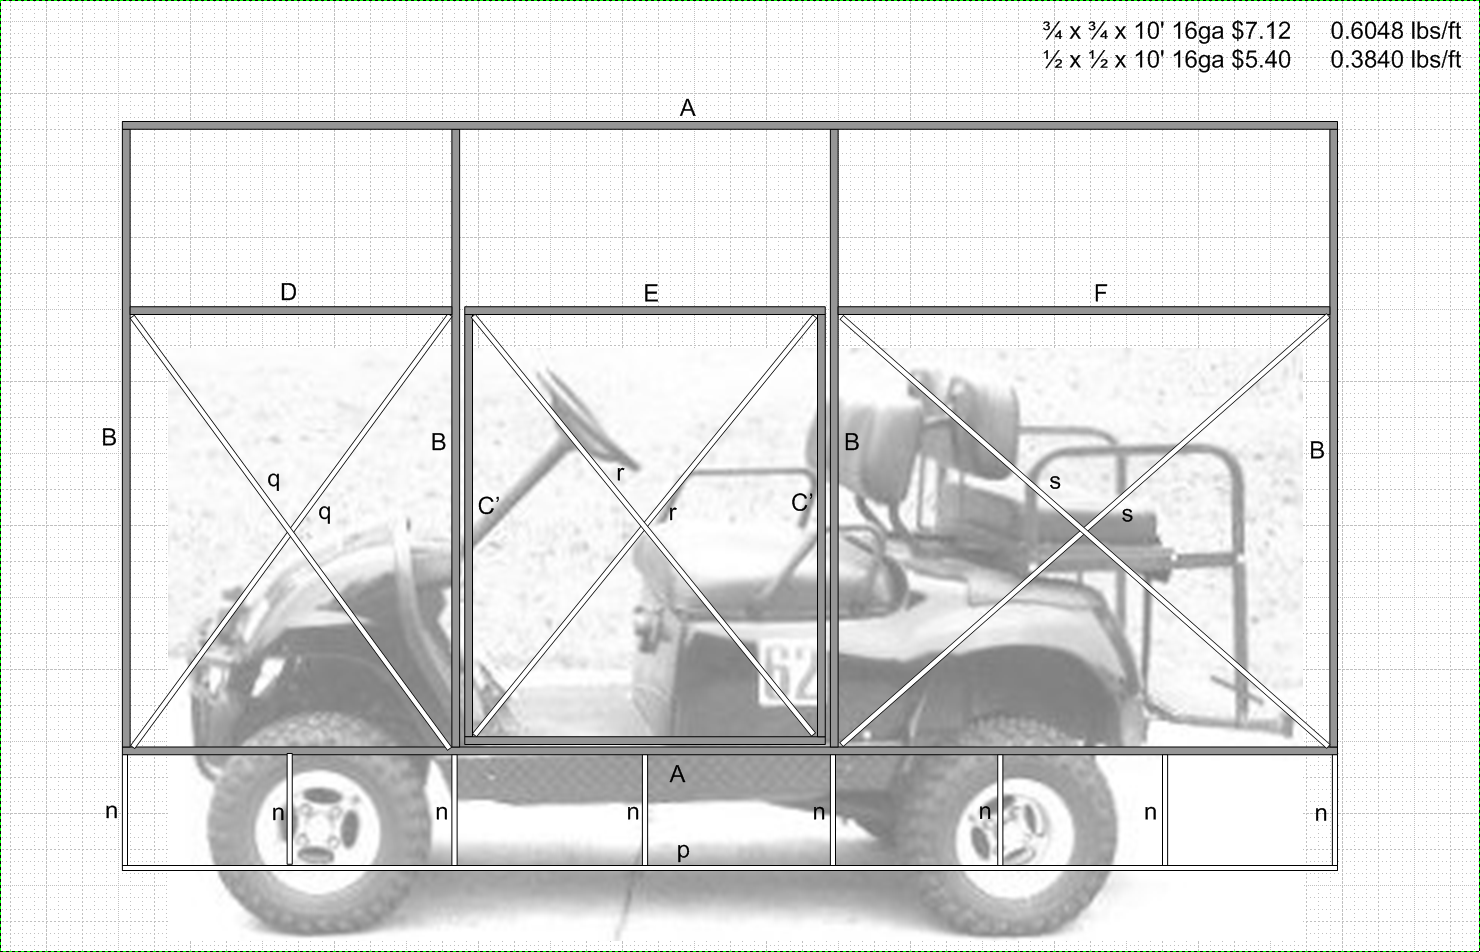
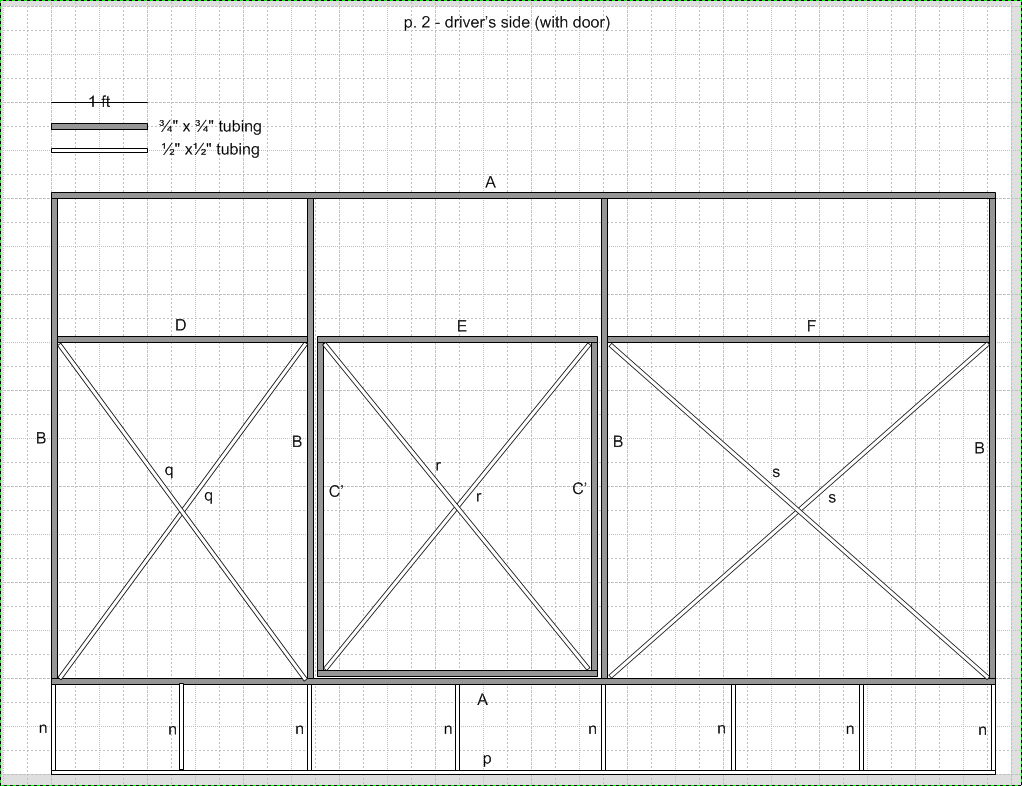
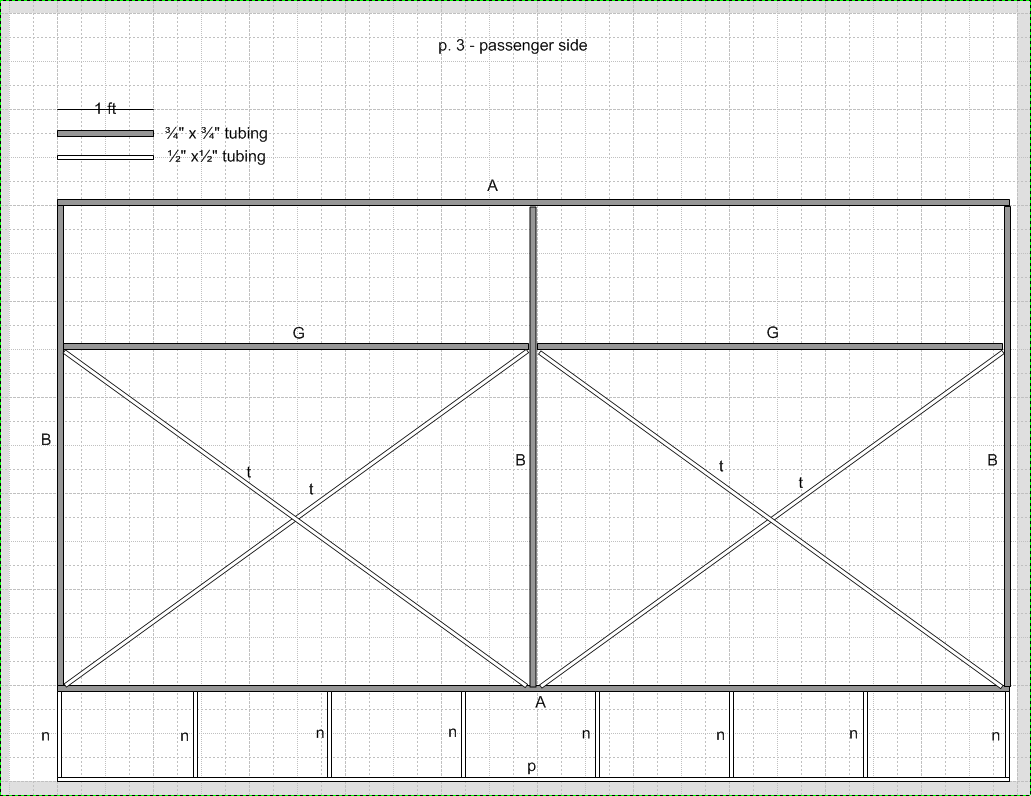
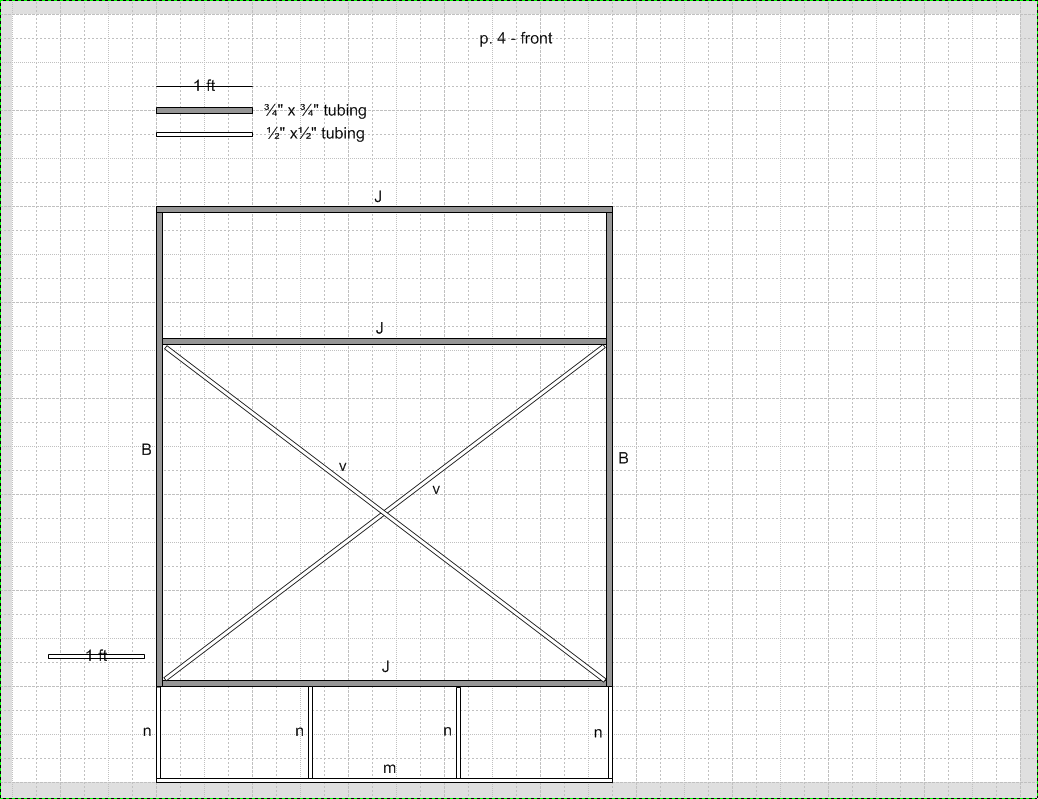
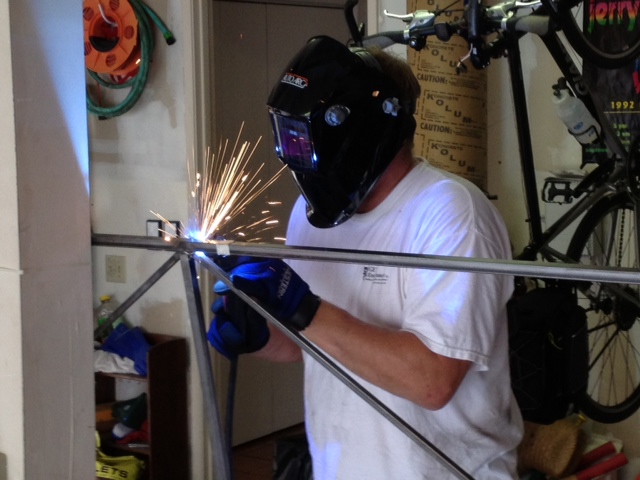
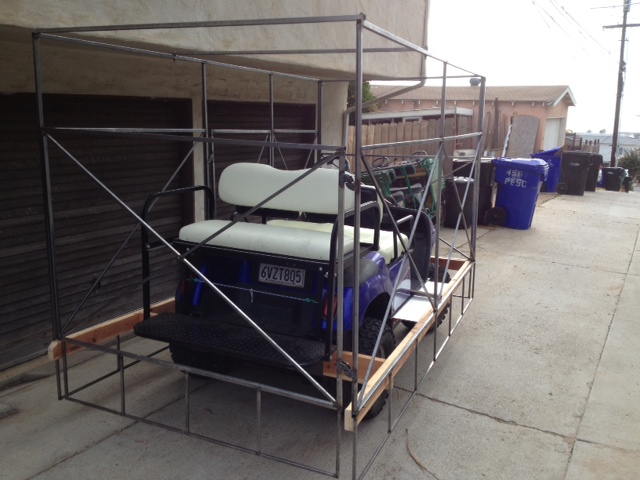
Metal Frame Build - July 7-9, 2013
I'm glad we went with the steel frame. It's very strong and fairly light, considering.
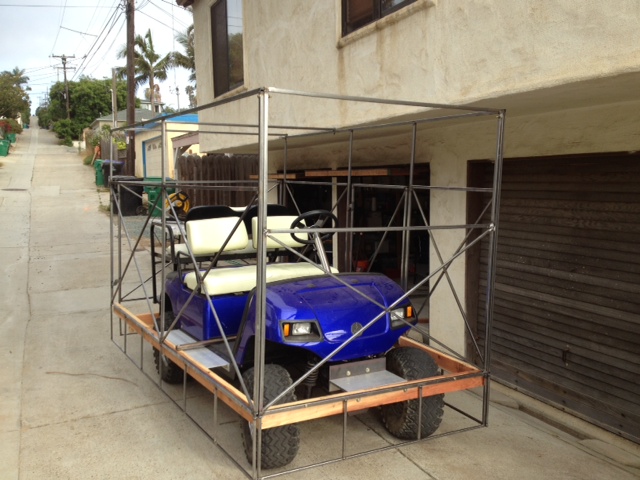
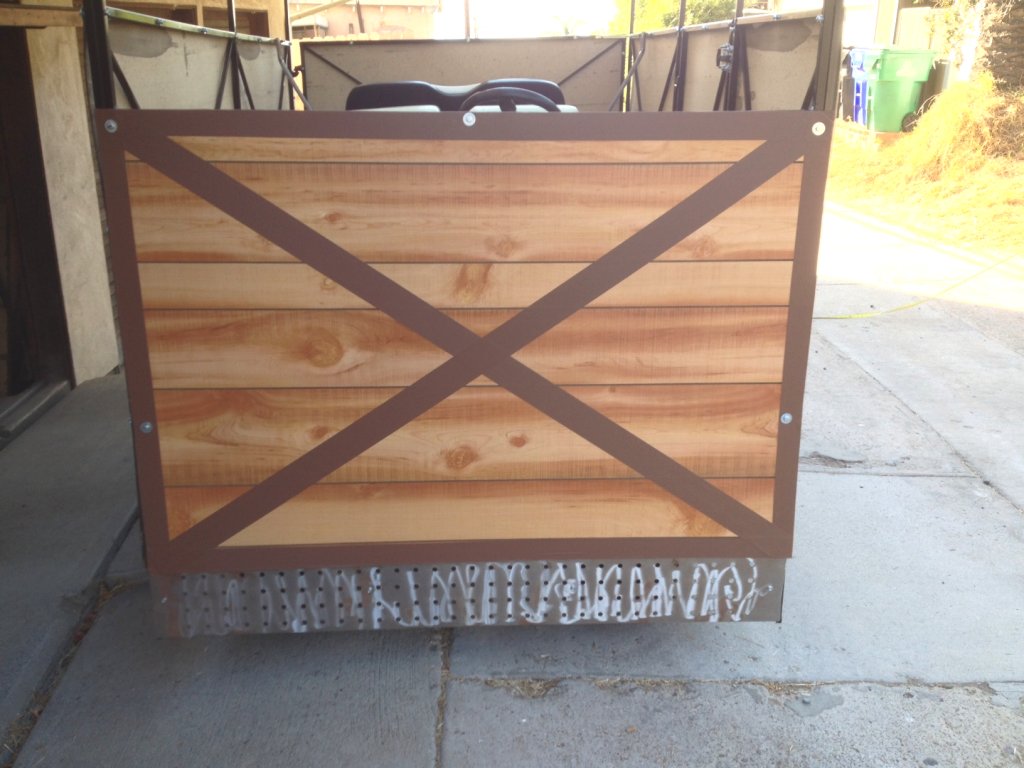
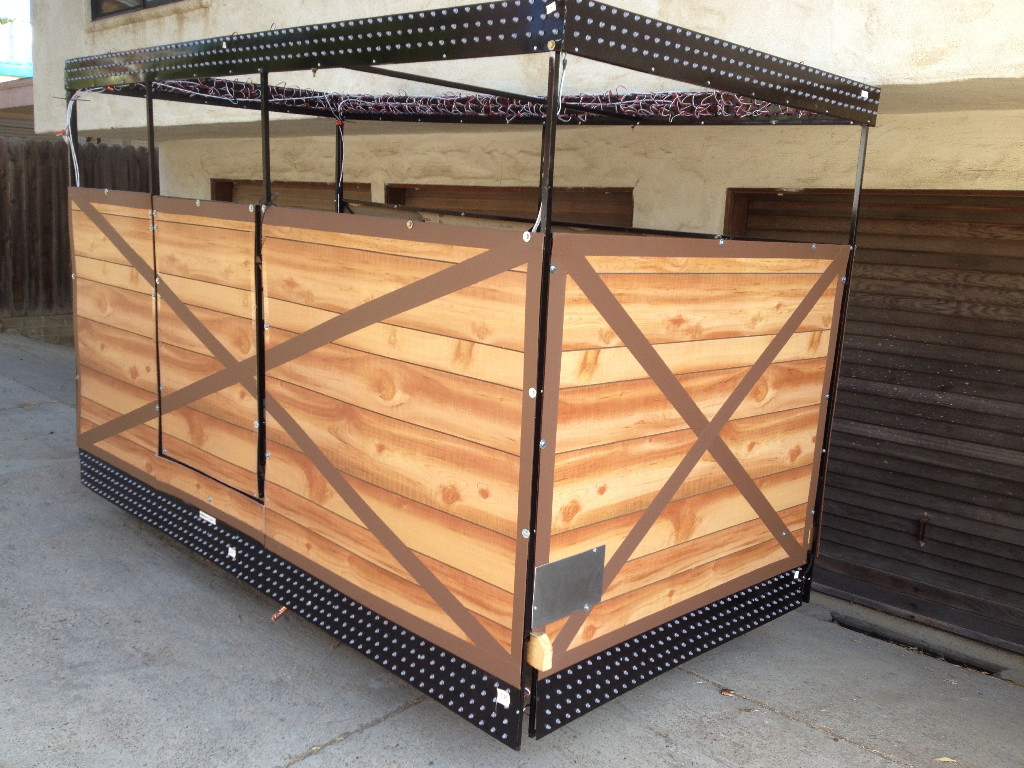
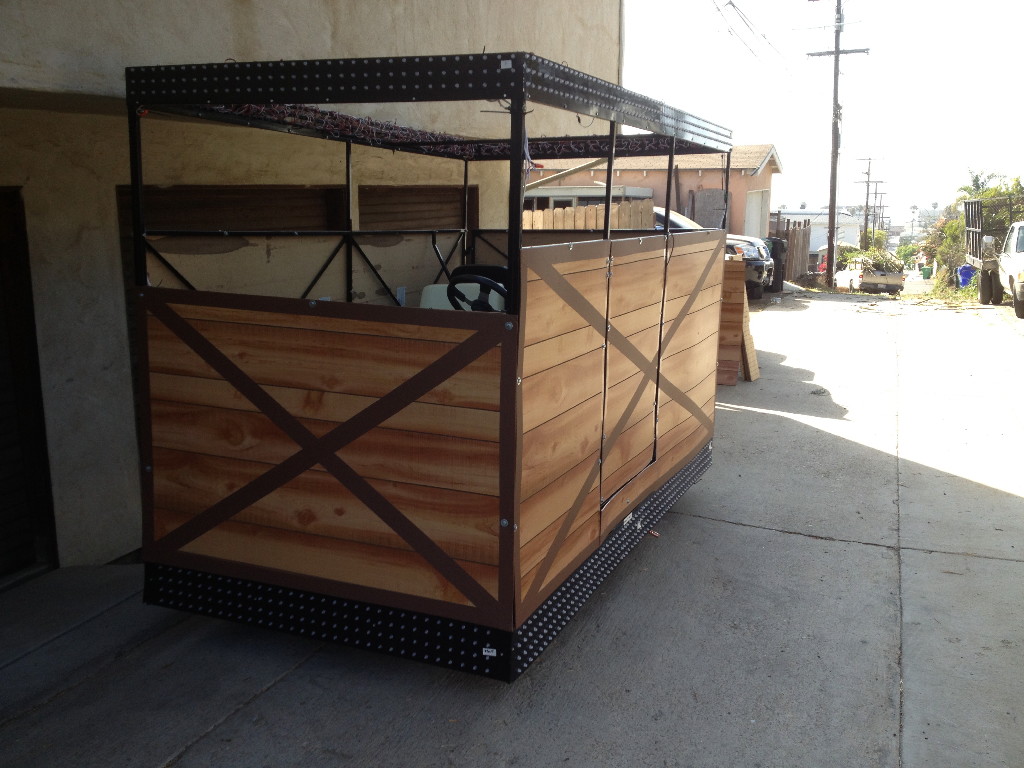
"Wood" Siding Prototyping - July 24, 2013
I considered a bunch of different siding material options before deciding on this epic wood paneling from Lowe's. I call it Cartoon Wood.
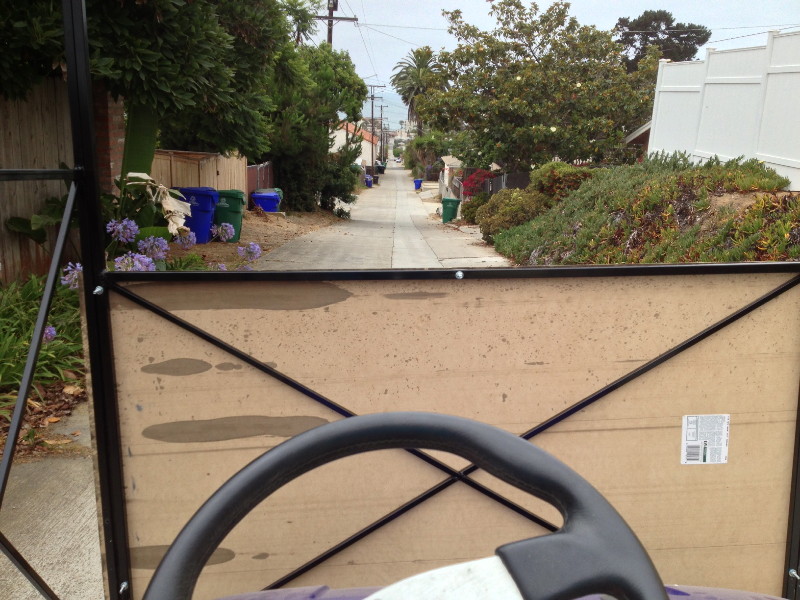
Forward visibility isn't too bad.
Briefly considered mounting the fake wood on standoffs. Bad idea.
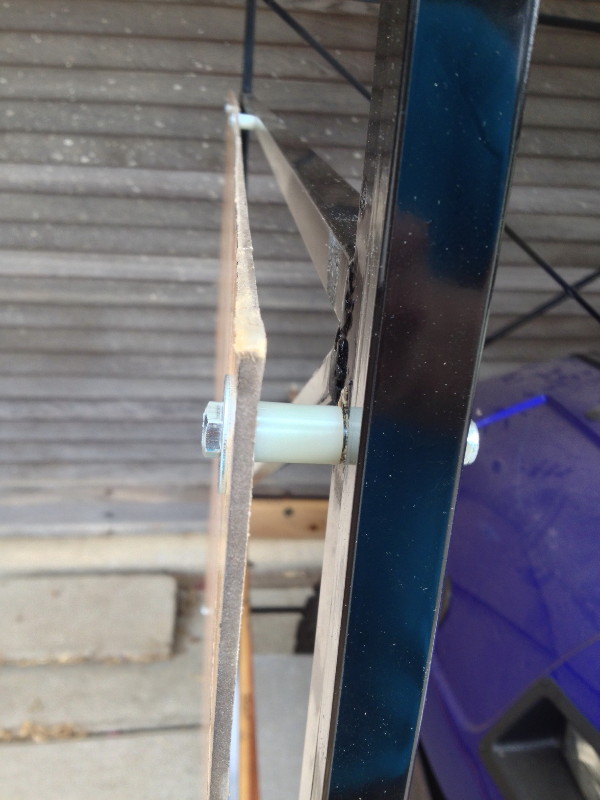
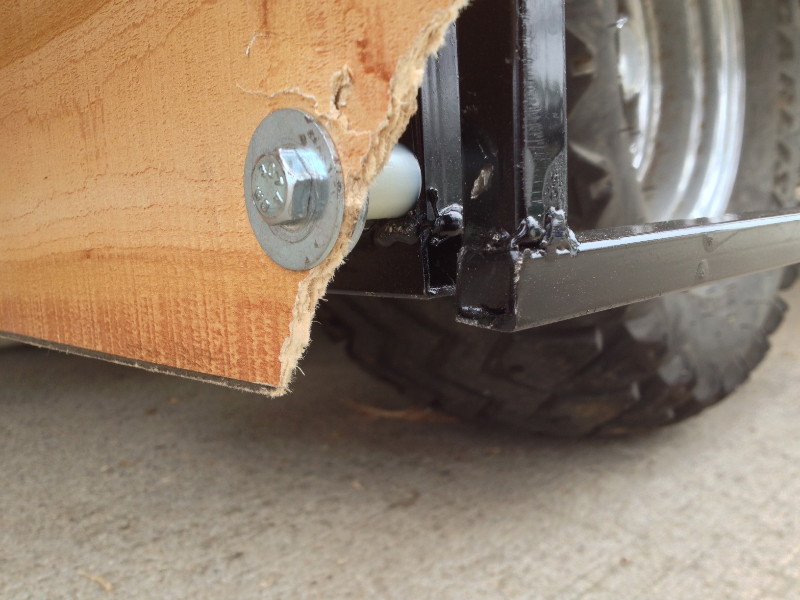
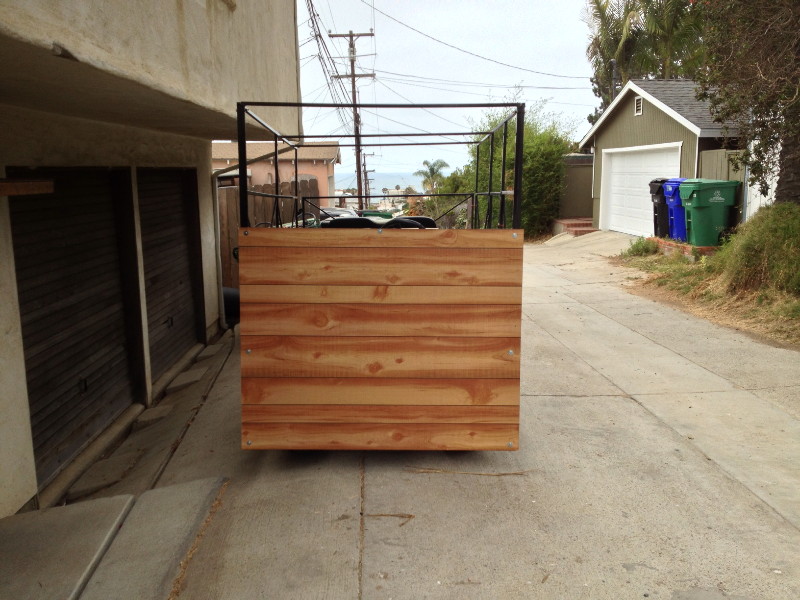
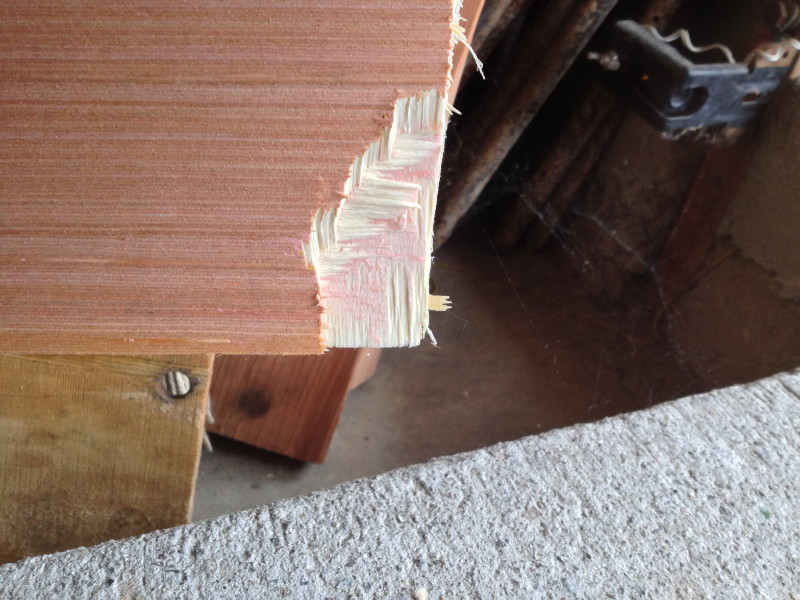
I also considered using 1/8" plywood which theortically would be much stronger; however the plywood turned out to be just as prone to chips and breaks as the cartoon wood. The upshot of all this is: the siding will be bolted directly to the steel frame and will not overhang the frame anywhere on the cart. When these corners are supported by steel behind them, they don't break like this.
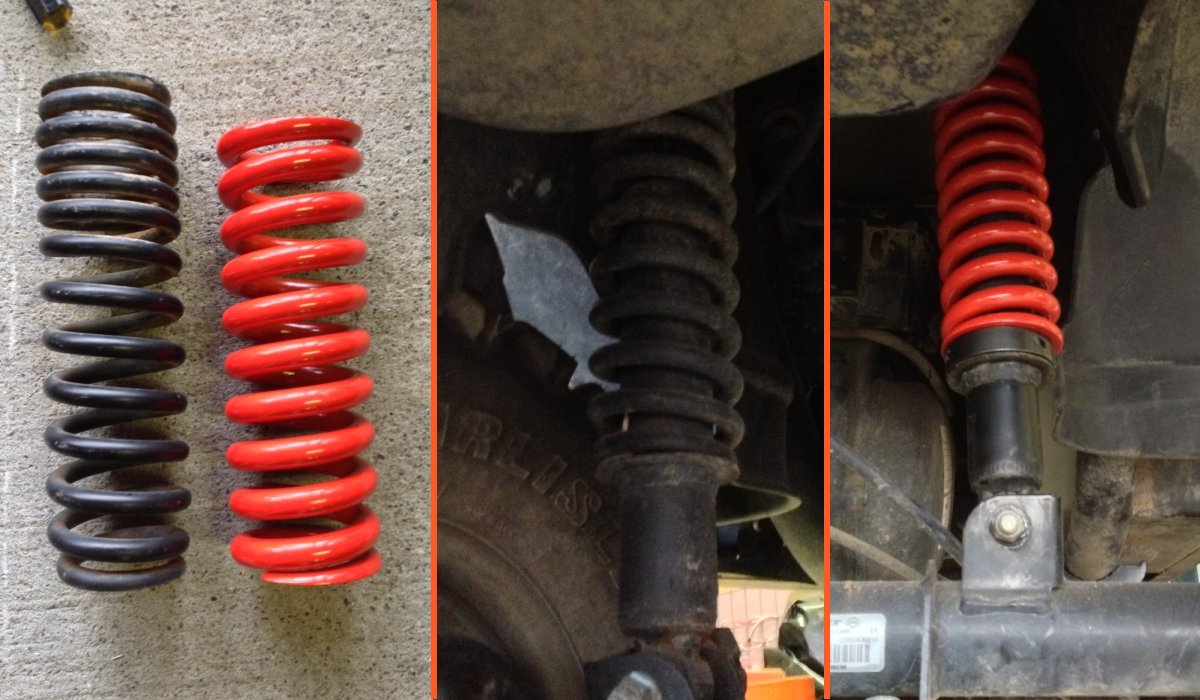
Erasmus B. Dragon - July 25, 2013
All the extra weight on the car was causing it to ride a little low in the back, so I installed heavy-duty springs today. The new springs are a little shorter (but come with a spacer disk) and a LOT stiffer. I think the cart will support all this weight plus four riders without too much trouble. I am bringing spare drive belts, however.
July 27, 2013

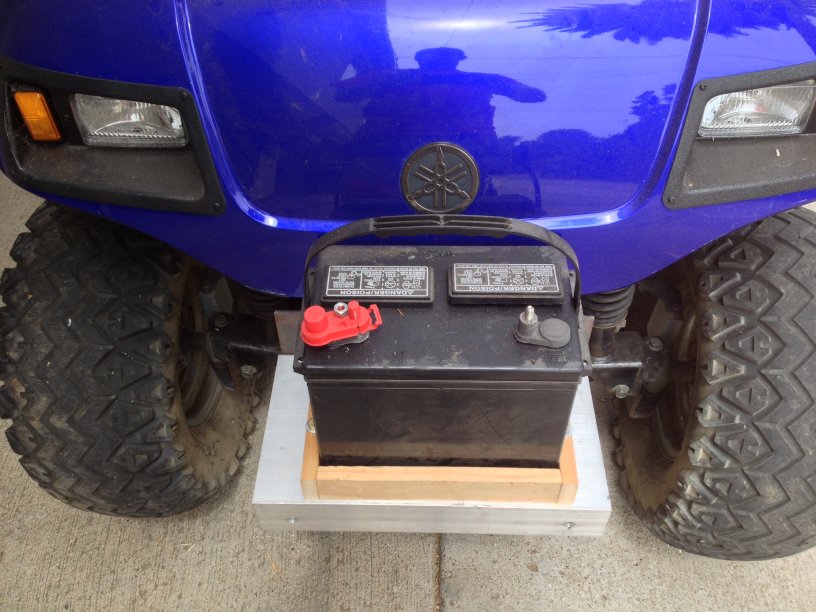
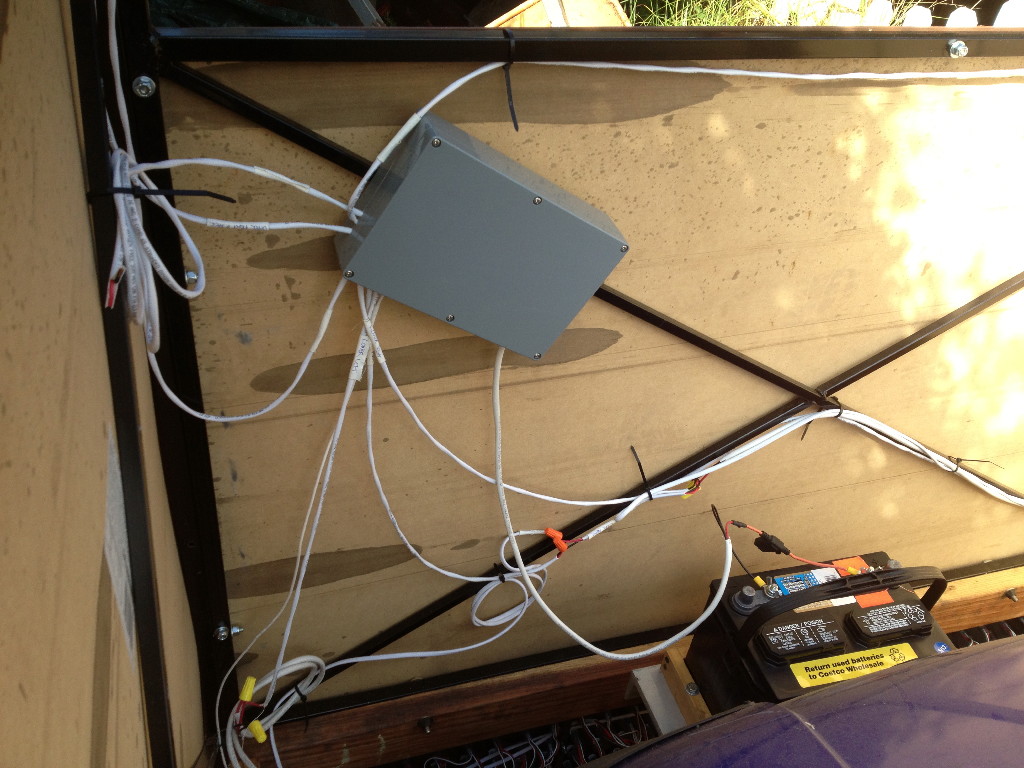
So... this thing is supposed to have "seizure-inducing lights," right? And all that seizure-inducing lighting will need a power source, which will be a Group 24 deep cycle battery.

August 3, 2013
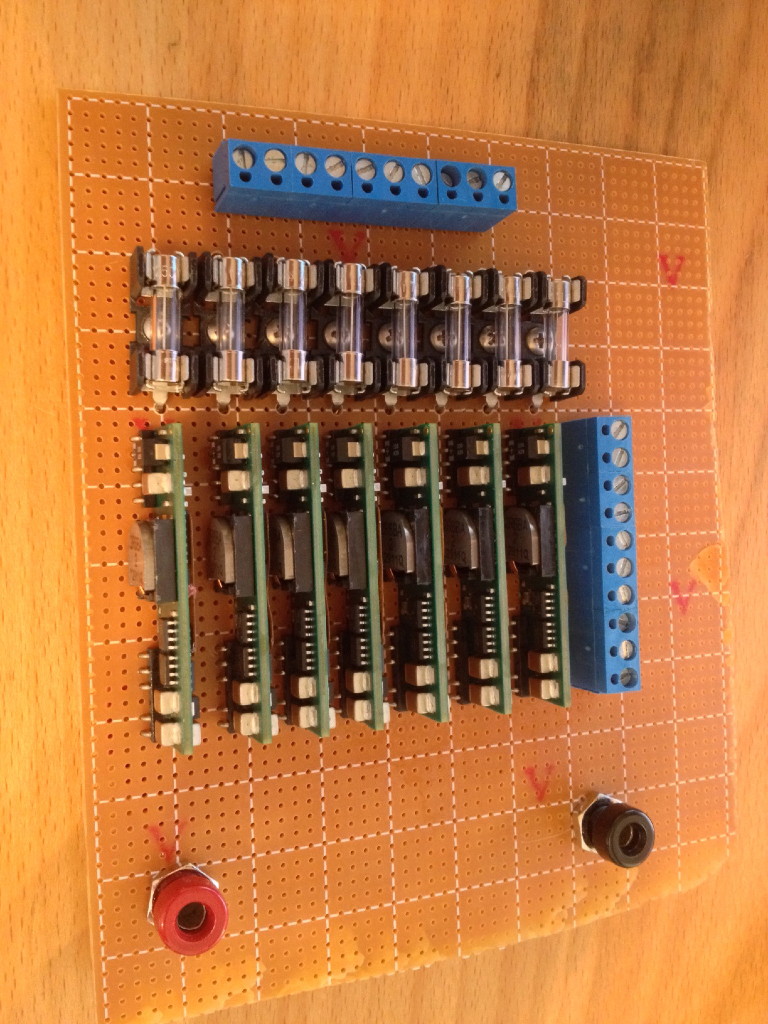
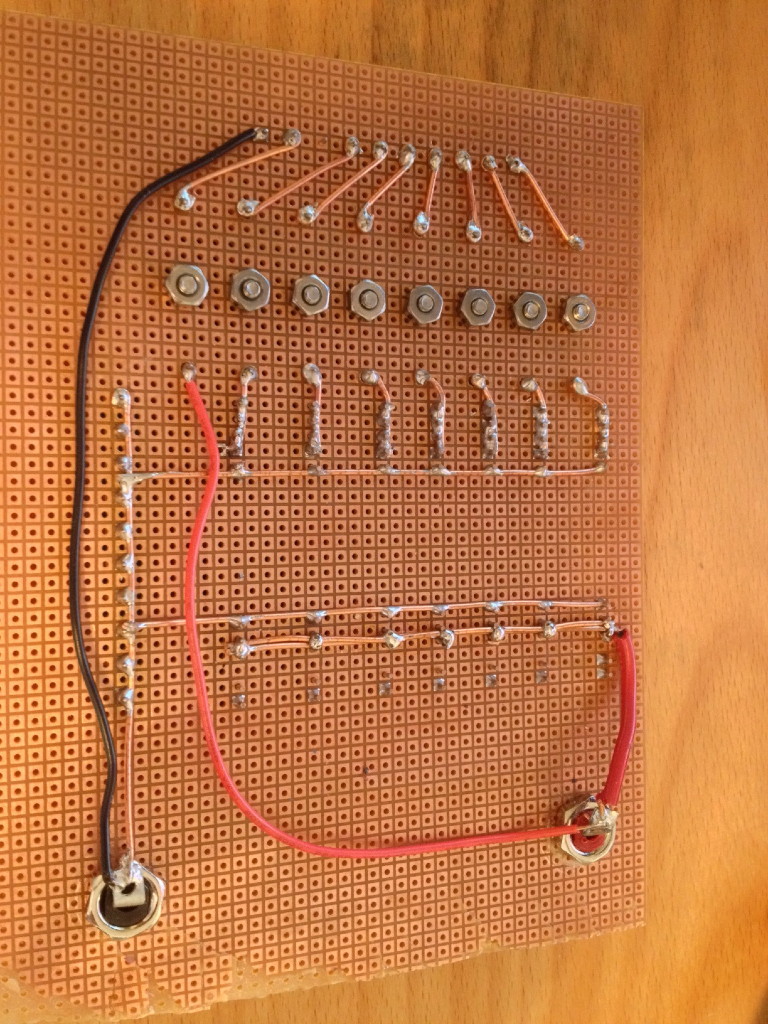
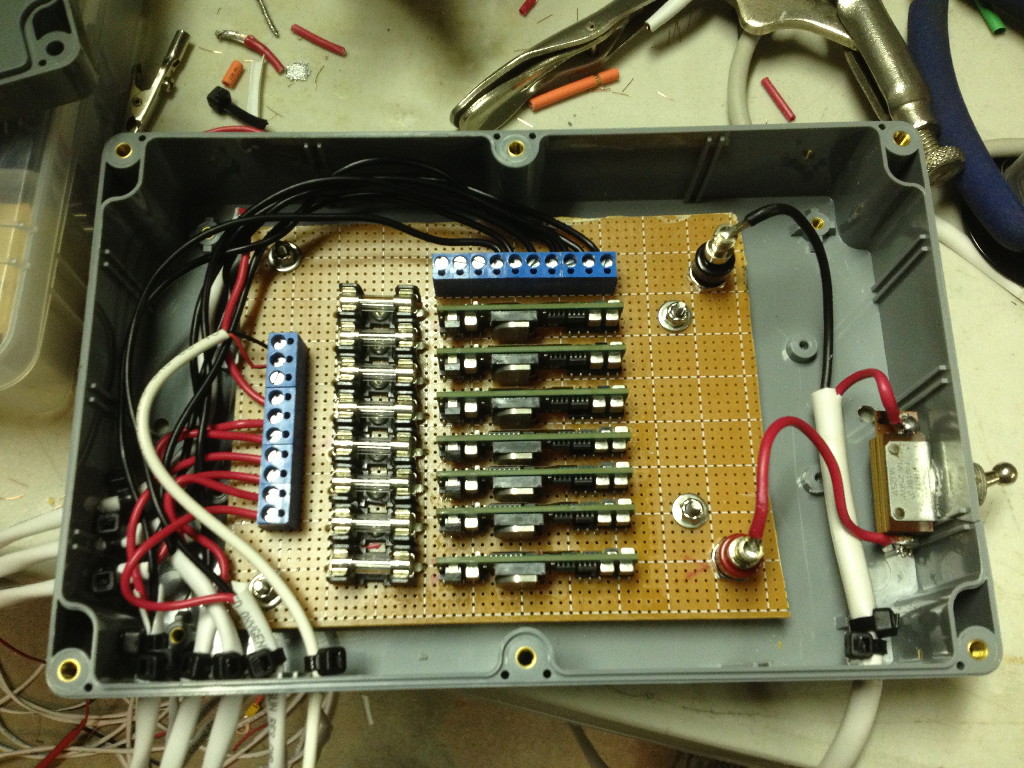
Did I mention there's gonna be a lot of pixels? Yes, there's gonna be a lot of pixels! Approximately 1800 of them, all individually controllable. These pixels run on 5 volts, so I need a way to step the 12vdc deep cycle battery down to 5vdc. In theory, if all the LEDs were on at once, with the Red, Green, and Blue components of each LED on full brightness (giving something approximating white light), the whole mess would draw something like 105 amps. So this thing is going to need a super beefy power supply. I am using seven 10-amp DC-DC converters, which means that I can't actually have everything running full-tilt-boogie at once. But one of the things I've learned from previous LED lighting projects is that you can easily use the human eye's persistance of vision to create the illusion that all the LEDs are on at once when they're actually not. And I've also found that sparse, fast moving displays are far more visually interesting then slower, fuller ones, so I think the theoretical max of 70 amps from this power supply will be plenty.
August 5, 2013
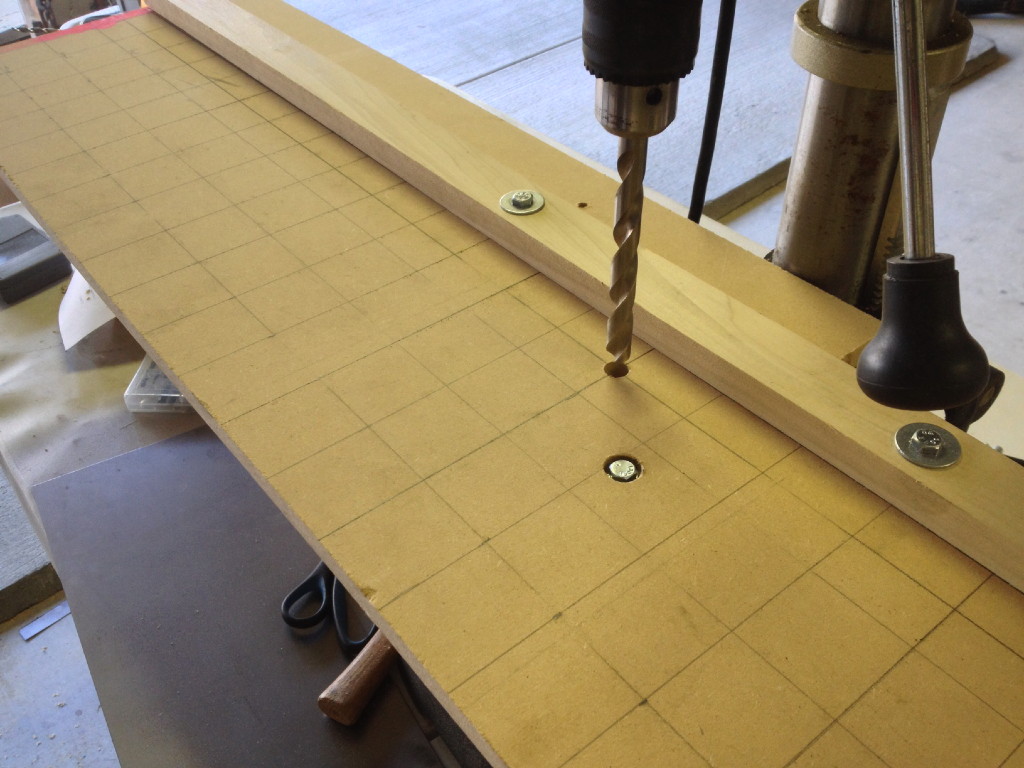
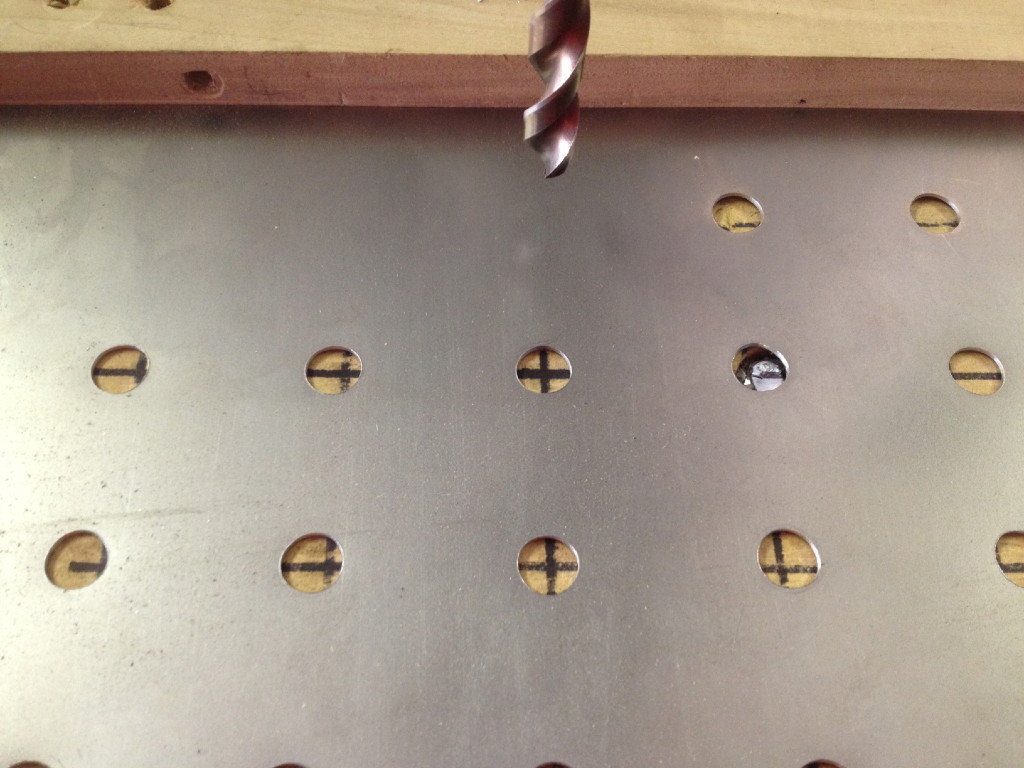
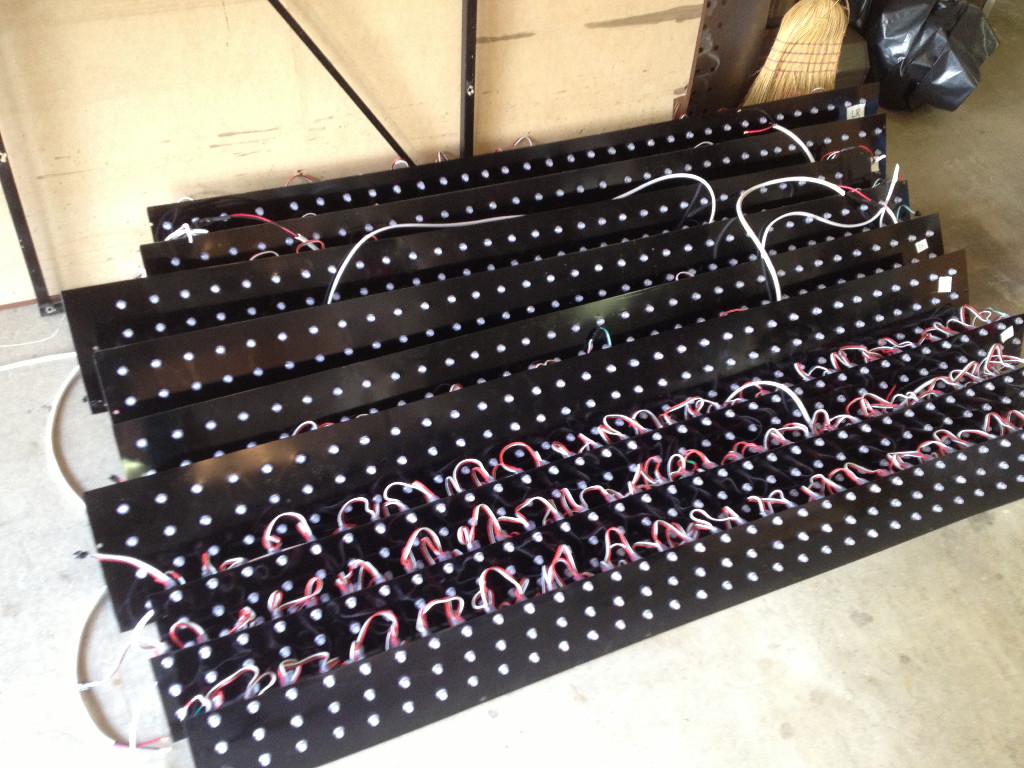
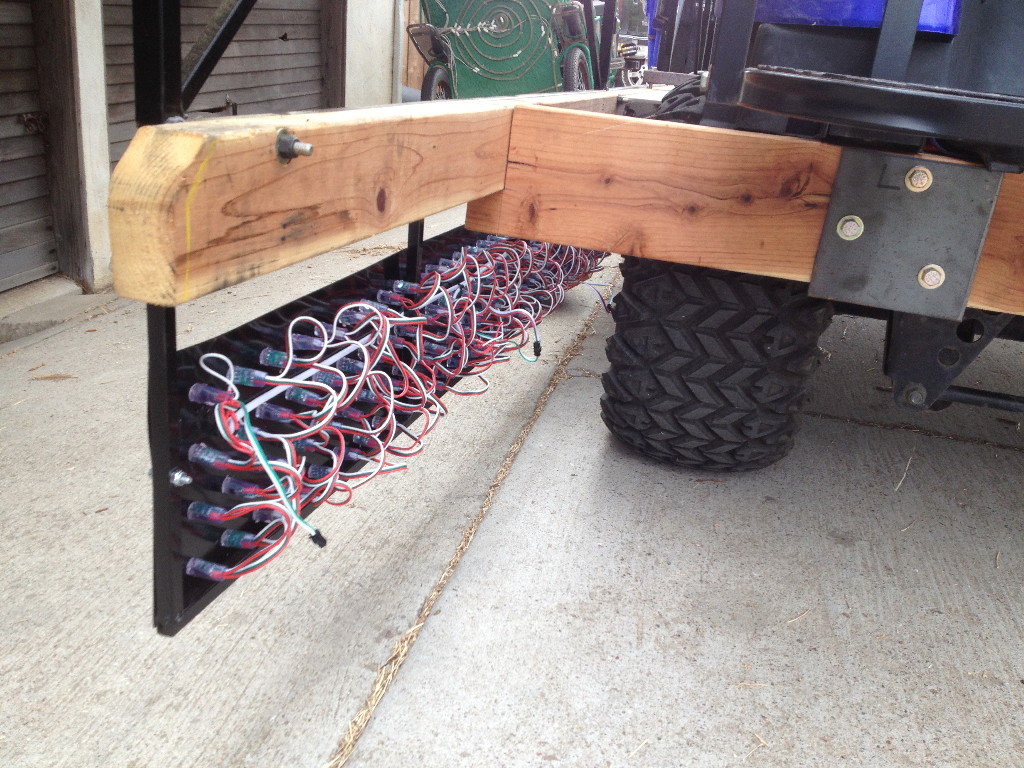
The LEDs will be embedded in steel panels that run along the bottom and top of the metal frame. Ideally these will be on an evenly-spaced grid, which means I need a way to drill evenly-spaced holes. Today I built a prototype jig to facilitate drilling holes at regular intervals and made a test panel.
Hey, not too shabby, eh?
August 6, 2013
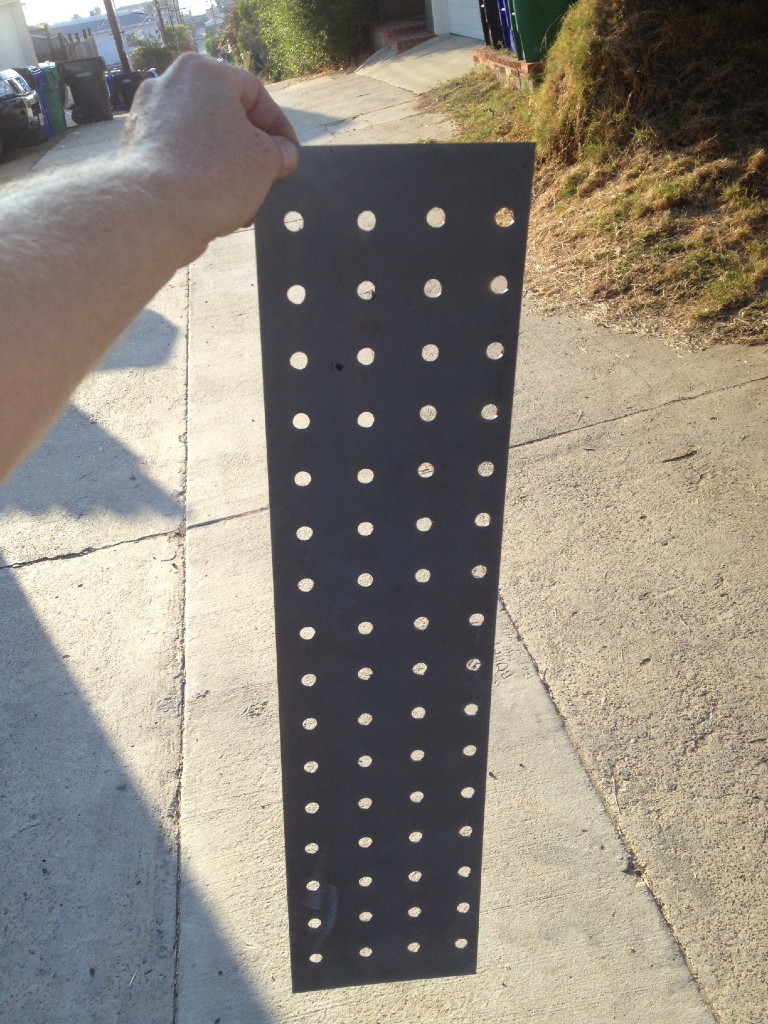
Took a couple more tries getting the cutting jig right, but I once that was out of the way I banged out the front and rear lower panels today, Hopefully I'll be able to knock out the lower side panels tomorrow and start working on the upper panels. It's kinda starting to look like the drawing though.
August 8, 2013: Drill Baby Drill
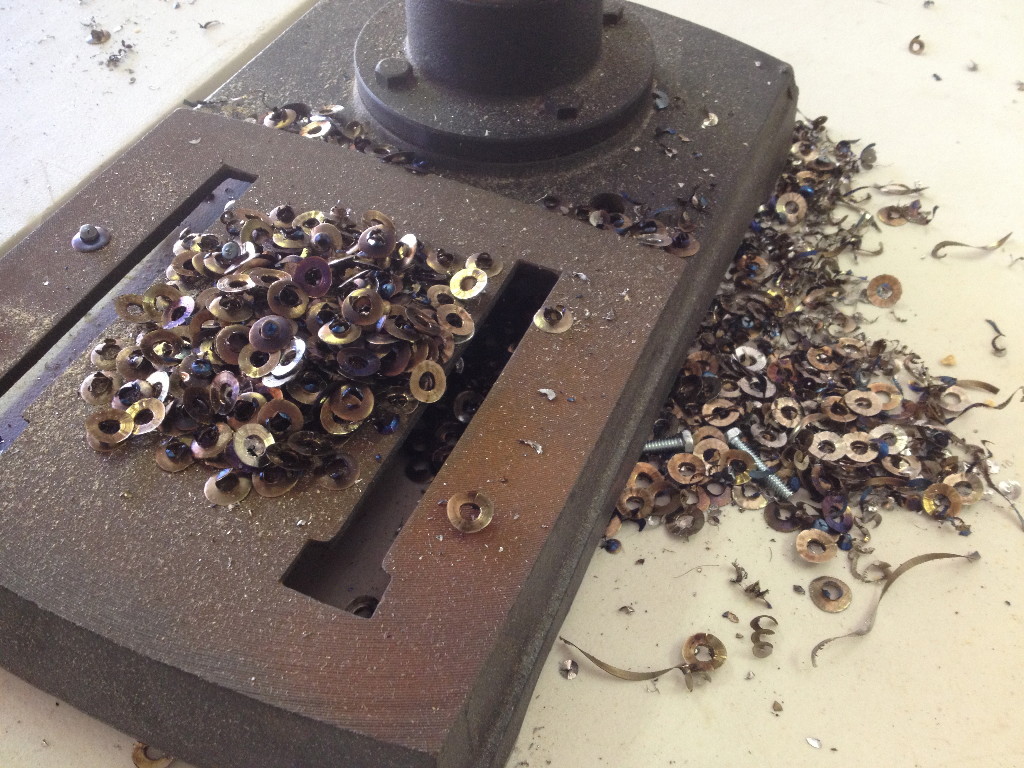
Drilling the 1400 holes took probably 8-10 hours, between the actual drilling and measuring the metal for alignment. Was not fun, glad that part is over.
August 12, 2013
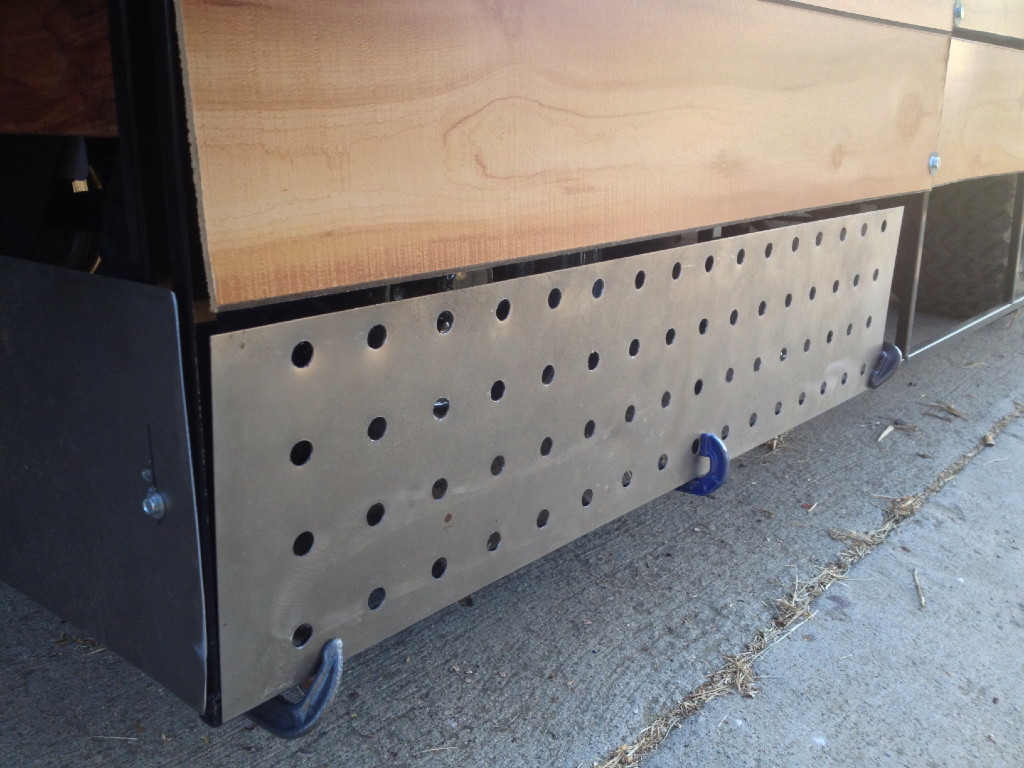
The metalwork finally having been done (mostly) it was time to string the LEDs. The LEDs come in strings of 50 pixels. Although there are connectors that allow you to daisy-chain the serial data line, fresh power and ground need to be supplied approximately every 50 pixels because of voltage drop in the thin pixel wiring. In some places I used 16ga and 14ga in others. The wiring harnesses are soldered everywhere except where it needs to come apart for transport.
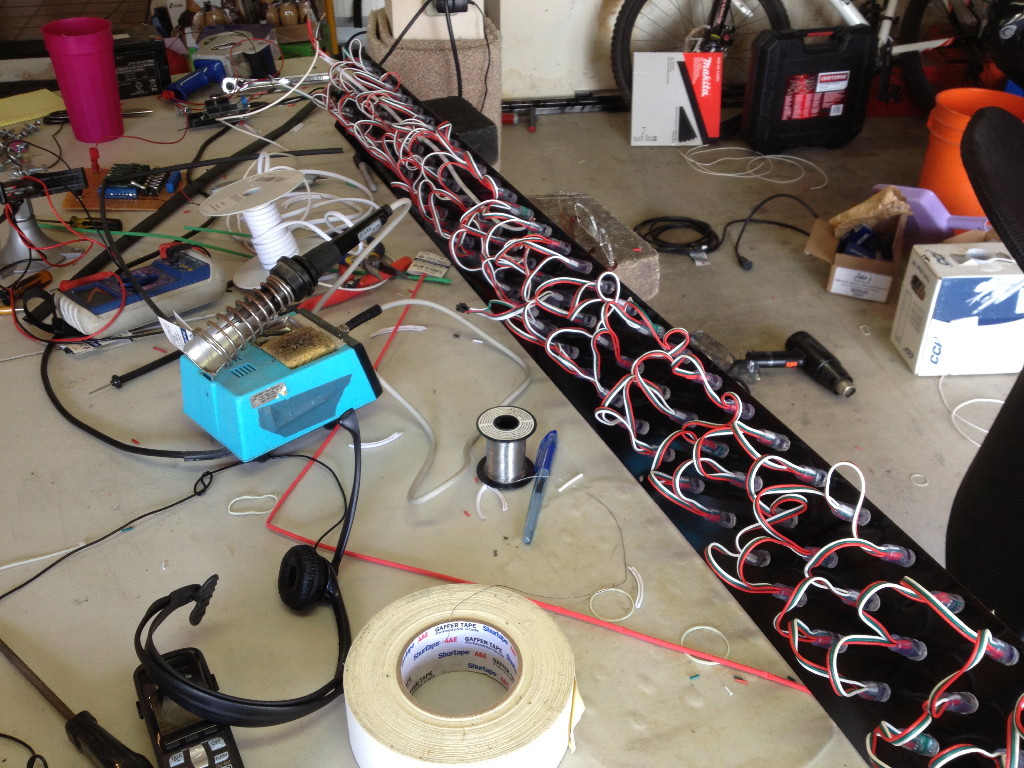
Time to mount the power supply in its case and wire it up to the harness.
August 16, 2013
OK, pretty much done with the mechanical stuff. Now the mad coding spree begins in earnest. Need to come up with a bunch of hopefully visually interesting lighting patterns.
As of tonight, here's what it looks like:
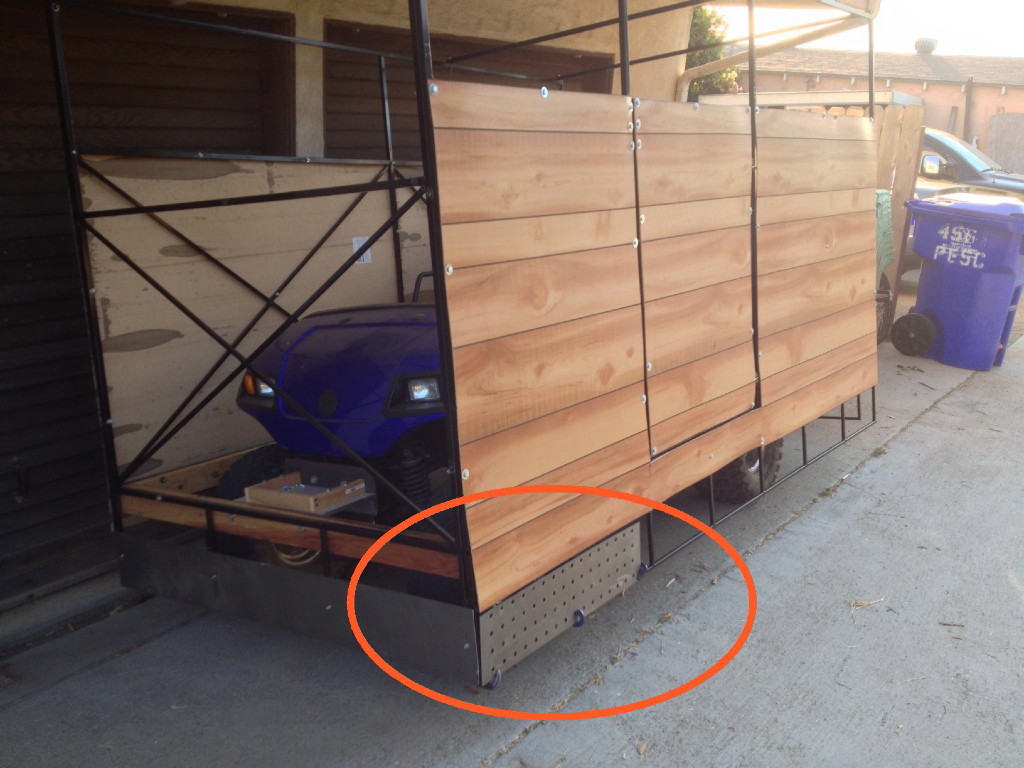
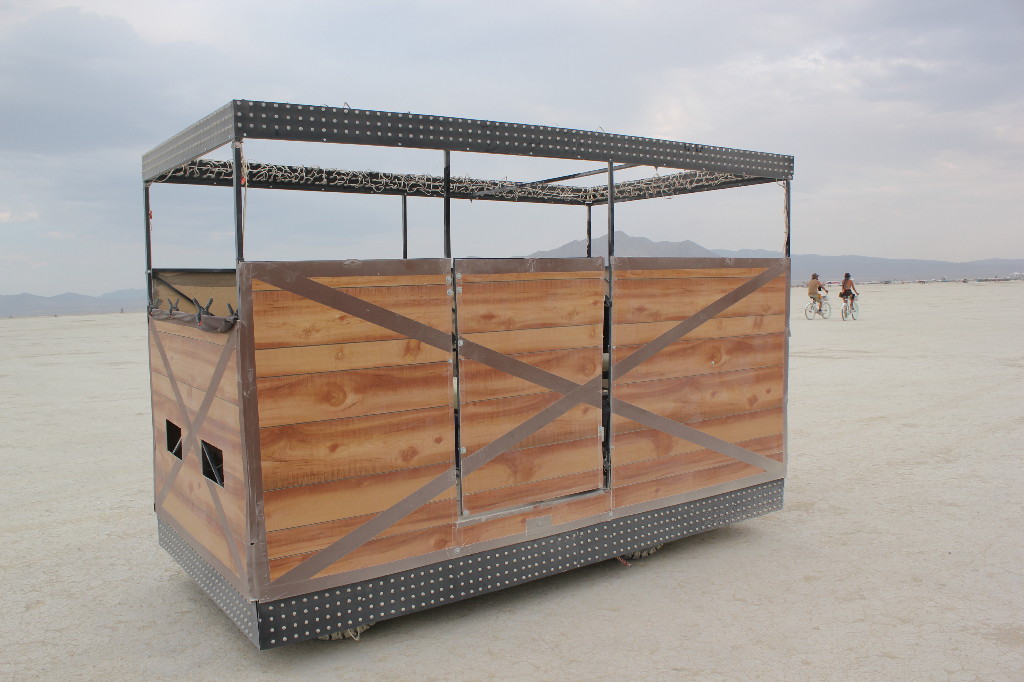
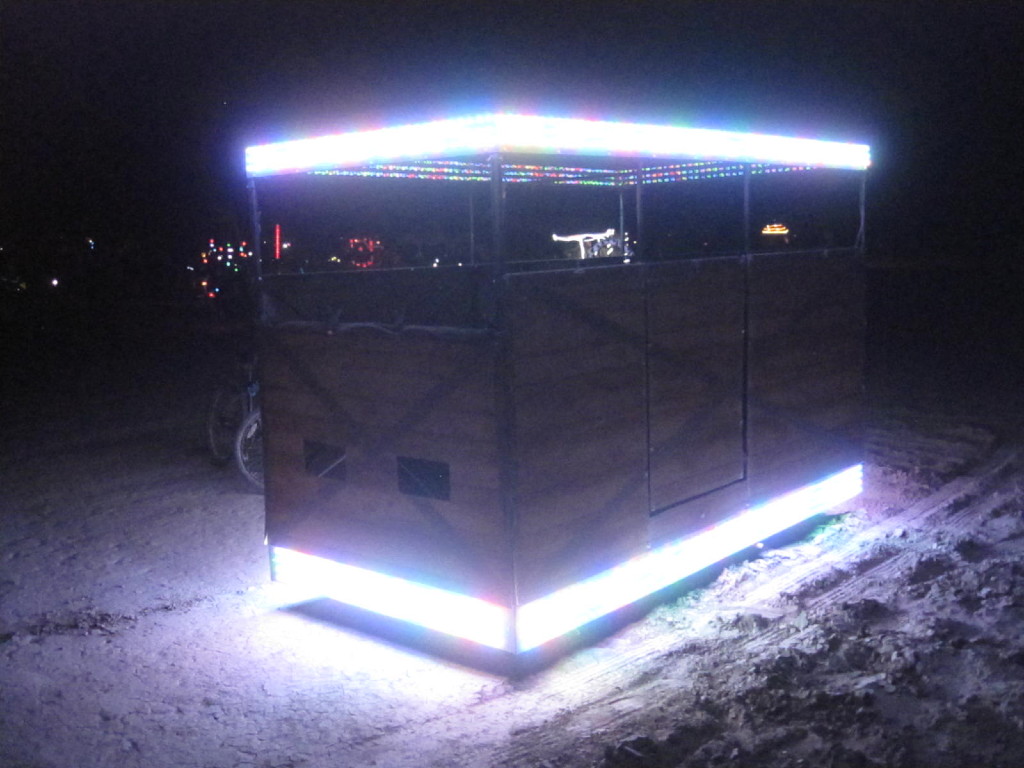
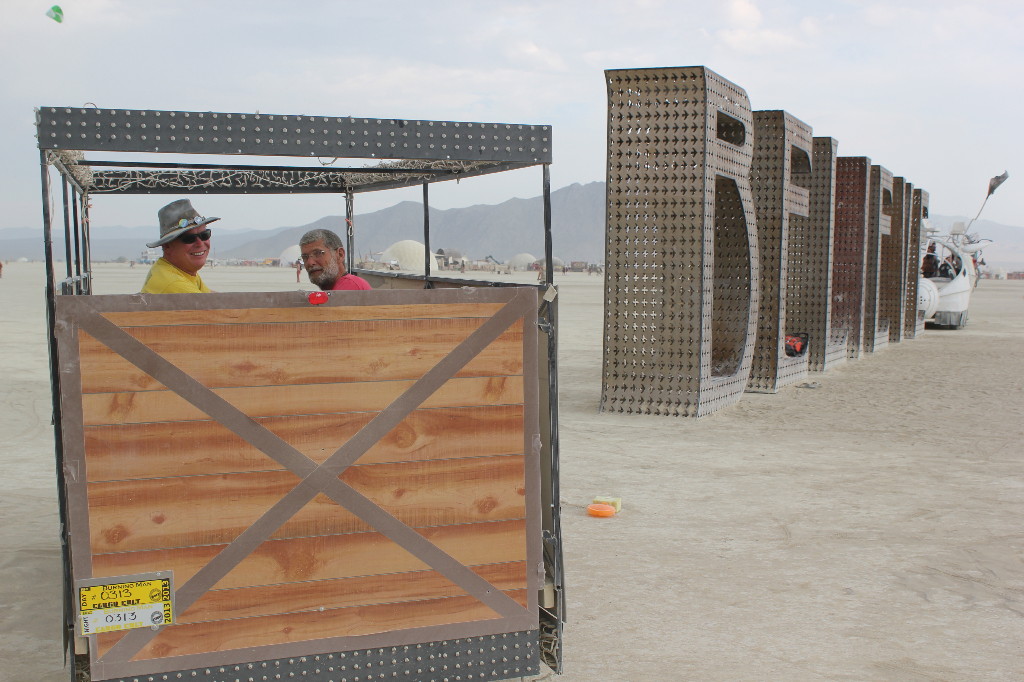
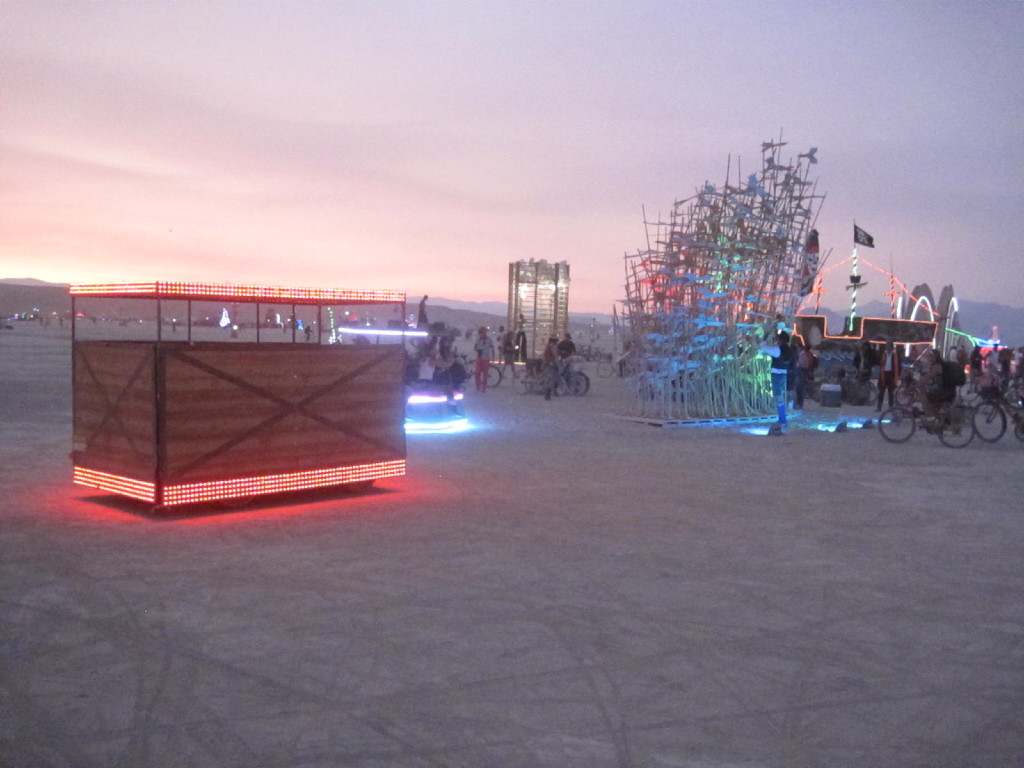
Cargo Crate on playa!
Showtime! So... the crate did great at Burning Man. I had no mechanical or electrical issues whatsoever, and even though it got driven a LOT I only burned through about 4 or 5 gallons of gas. Here are some photos.
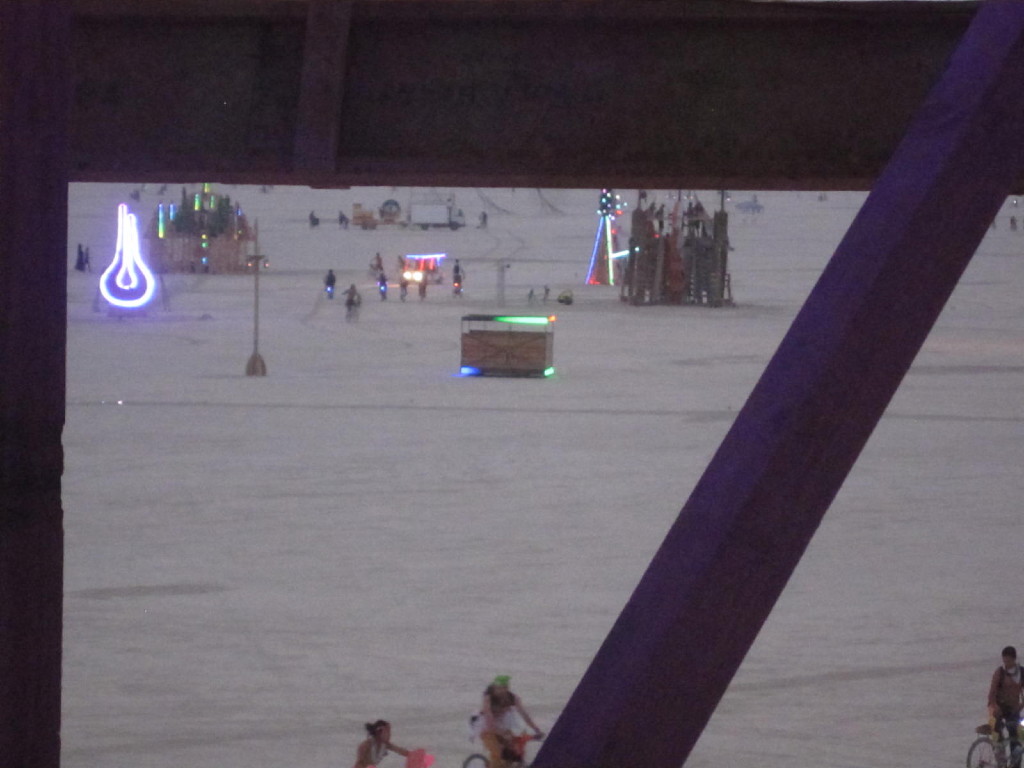
I didn't shoot much video, and many of the patterns involve stroboscopic effects at a frame rate much higher than video frame rate. Anyway, here's what I've got: